April 25, 2023
As of this writing, this post in now going to a larger audience and my son Eric is also turning it into a blog. Because of this, I won’t know everyone who receives this post and future posts, so I want to take the time to explain a couple of things some of you already know about me, and also my philosophy about motorcycles and building almost anything.
This is a hobby for my son and me. We don’t do this for a living and there are many other interests, which take up our time. If we get in a full day a week of work, that’s a good week. Our shop is my small garage in San Francisco. We have some tooling, a lathe, band saw, valve and seat grinder, drill press, welders, grinders, buffing wheels, many hand tools, etc. but of course we would like more! We are keeping our eyes open for a Bridgeport type vertical mill, but a full height Bridgeport won’t quite fit in my garage and although not mandatory, single phase 240 volt would also be nice. I worked as a machinist for a couple of years many years ago, so I have some prior experience. Between 1968 and 1971 I also worked for Sandy Kosman, who recently passed away, and has been inducted into the Motorcycle Hall Of Fame. It was a great experience, but most everything I have done in life has been self-taught. I left Kosman and went into construction, getting my general construction license and then ended up as an electrical contractor.
I am now 80 years old. I’m disabled with a rare heredity disease called Charcot-Marie-Tooth or CMT (named after the three doctors who discovered it in the late 19th century). It is part of a group of diseases that fall under the Muscular Dystrophy Association label and affects almost 2.8 million people worldwide (133,000 in the US). It affects the nerves in my lower legs, feet, arms, and hands, which causes muscle loss. It is progressive and I continue to lose strength and balance. To date there is no cure, but there are some drugs for some types and the research is promising. I guess I was lucky, as it didn’t start affecting me until my late 50s. My particular type of CMT is Type 2, axonal. To date there have now been over 134 individual genes identified that are mutated in some way and associated with different types of CMT. Even though I have been tested for most of these, and also had complete genome sequencing and a complete exome sequencing, no gene has been associated with my particular type of CMT yet. This is the case for over half of the CMT2 affected people Because of CMT, I have weak ankle muscles, so my balance isn’t too good anymore. I have lost quite a bit of strength in my hands and arms too. BUT, to paraphase a line from Monty Python, I’m not dead, just stunned! I still love to work on almost everything, especially motorcycles. You can check out my Rickman Triumph project in this blog or at Return of the Cafe Racers.
I completed that project a couple of years ago now. The isolation of COVID-19 gave me plenty of time to work on it. Although my riding days are almost over because of CMT, I plan to build bikes for as long as I can.
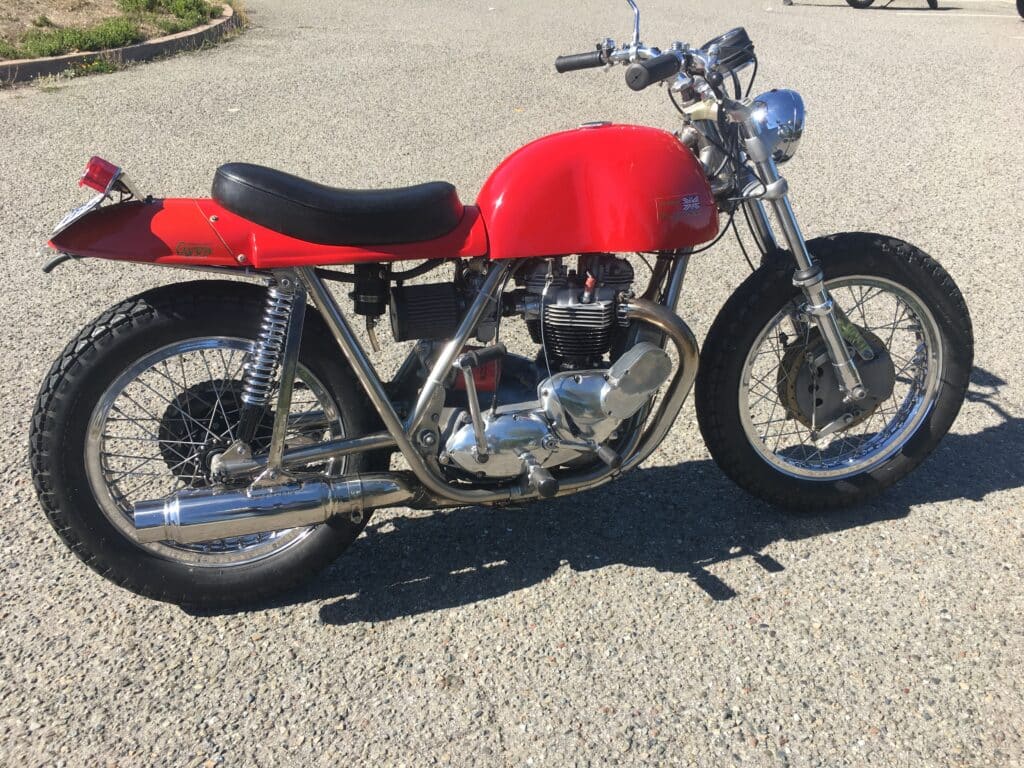
I have always loved British bikes. They look and sound great, were powerful in their day, and handled well. But I am anything but a purest about them and never have been. In my opinion they were highly flawed and anything I could do the make them better or more reliable was and is something I don’t hesitate to do. I like perfectly restored bikes by others, but if you are a purest and want to see a stock perfectly restored machine from my son or me, you are wasting your time here. The only thing I’m trying to do here with my Rickman or the 1964 BSA Spitfire Hornet is to keep them looking period correct. Mostly. My Rickman was first constructed in 1969 as it appears now, with very few outward modifications since then. The BSA is a total tear down and re-make. It won’t be stock in any fashion, but it will have a 60s look to it. Interspersed with the work we are doing now on this BSA is work on my son’s 500cc DBD BSA Goldstar, his 850 cc Norton and his 1970 750 cc Triumph Bonneville. This is the second post about our BSA project and if it interests you, here is a link to the first post.
As a recap to new readers, we are completely rebuilding a 1964 BSA, A-65 Spitfire Hornet. It was my first bike and I have owned it since I was 19 years old. It has been sitting mostly untouched since 1982. I made many modifications to it, upping the displacement to 750cc’s, dual 34mm Mikuni carbs. Ceriani motocross front end and more, all back in the 60s. Our plans now are to upgrade the frame, suspension, front brake, and engine. We are getting a forged 4340 steel billet “stroker” A-70 crank, a change from my first BSA post It will not be a 270 degree crank now. We are also getting new 80mm pistons, which will bring the motor to 855cc’s along with other mods like timing side roller bearings, Carrillo H-Beam 4340 Steel Connecting Rods, hotter cam, larger valves and major head porting. Eric and I debated going all out with this project: new lighter chrome molly frame, alloy hubs with disc brakes, mono shock rear suspension, etc., and although the bike would be much lighter and stronger, the period look would mostly vanish. We settled on some frame mods to stiffen existing parts and we were on our way.
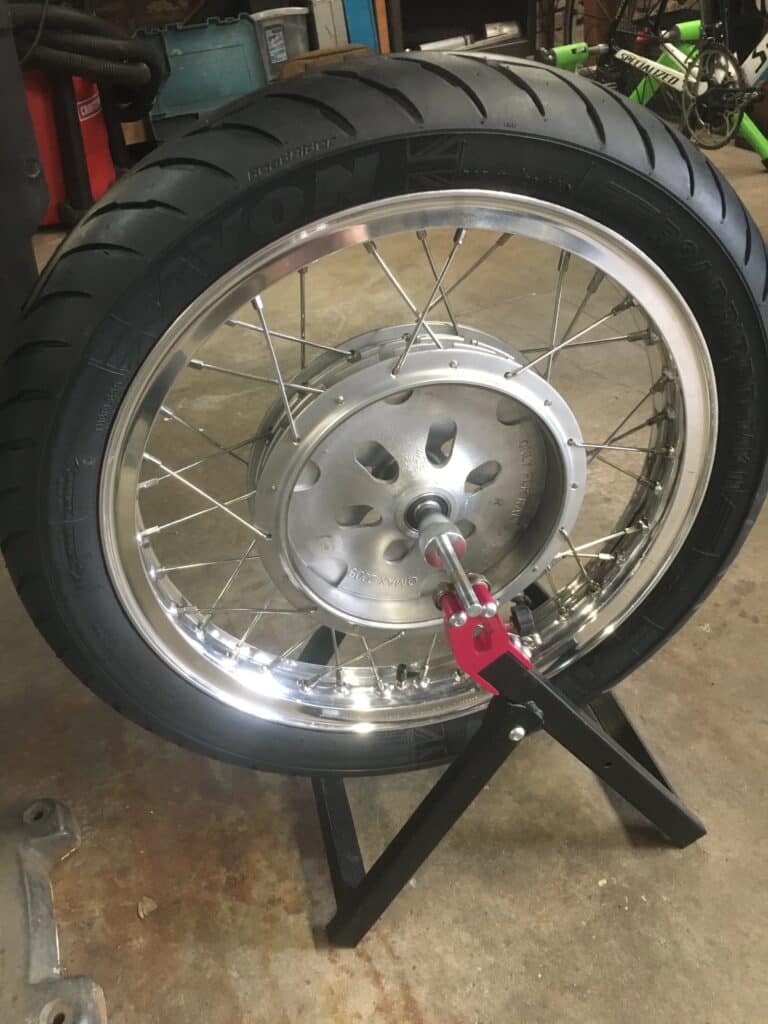
We have been making progress on our BSA project, but not without a couple of setbacks. Overall, we are moving forward. We finally sourced the Avon tires we were looking for. Avon may be going out of business and finding tires in the sizes we needed was an effort. Avon is closing their factory in Melksham, England by the end of this year and there is no word yet about opening another factory or closing down all together. My guess is that they will move to Asia, but that’s just a guess. Avon is owned by Cooper Tires, and Goodyear owns Cooper. Very few Avon sizes for any bike are in stock at any retailer so we feel very lucky to have found a set. I’d love to find an identical set for my Rickman Triumph, but it may end up being another brand of tire for that bike. The front tire of the BSA is now mounted on the wheel with the Robinson 4 leading shoe, 230mm front brake, Boranni aluminum rim, Buchanan stainless steel polished spokes and it’s beautiful.
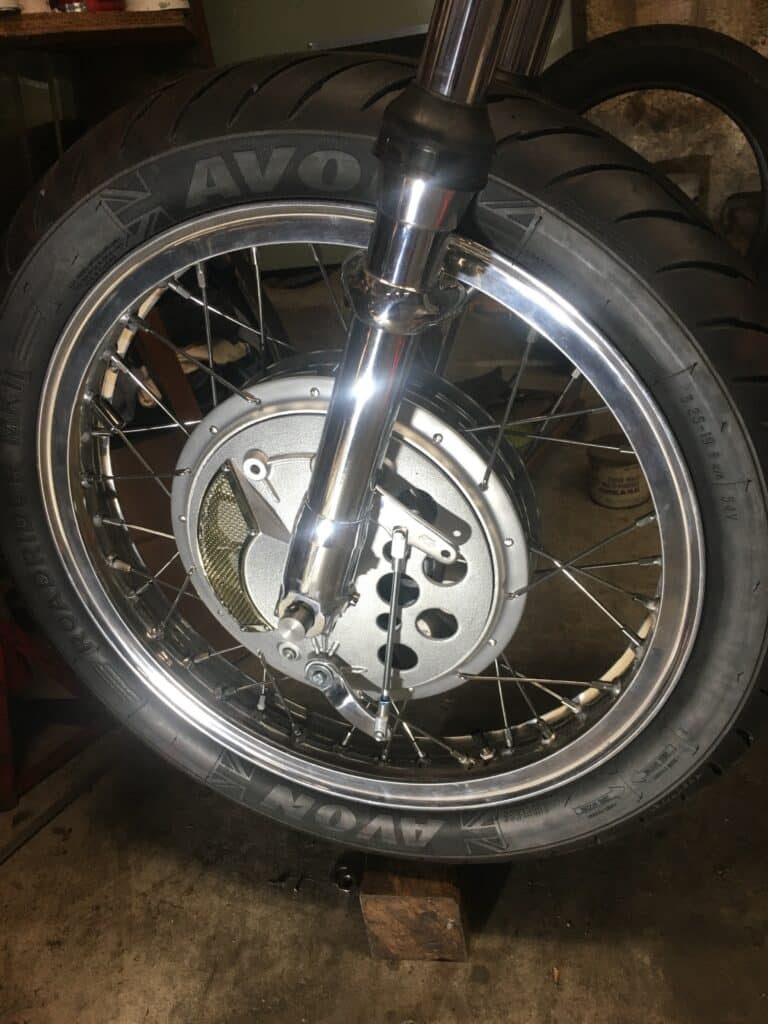
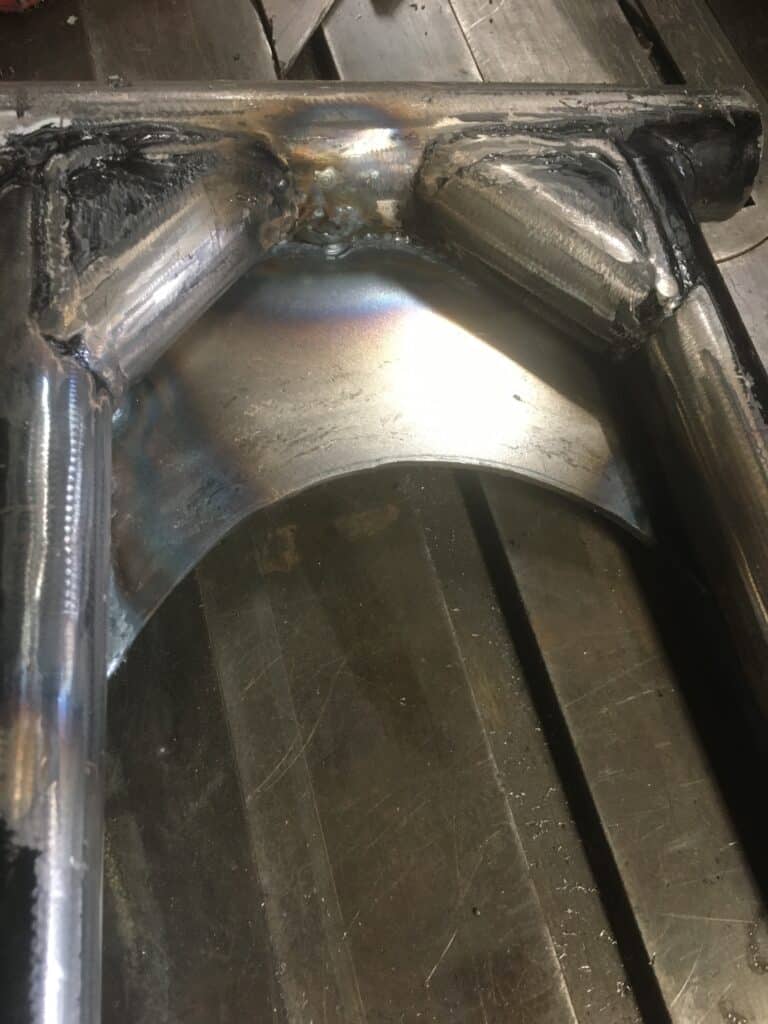
I machined the Ceriani stem to receive Timken tapered roller bearings and made spacers for the frame to accept the outer Timken races. I also machined a stainless steel upper dust cover, as we couldn’t find a BSA one easily. I needed a front axle, so I also machined one out of 4130 chrome molly steel and trial fit it to the forks and the frame. It took a couple of tweaks with stem length, spacers etc., but I think the front end is just about ready to go. I also made some cardboard patterns for gussets for the frame, traced them onto 1/8” steel plate and cut them out on a band saw. A pair of triangular plates will be TIG welded to the steering head and frame, and another pair welded where the swing arm goes through the frame for stiffening the frame in both cases. A third set of plates was made to stiffen the swing arm itself.
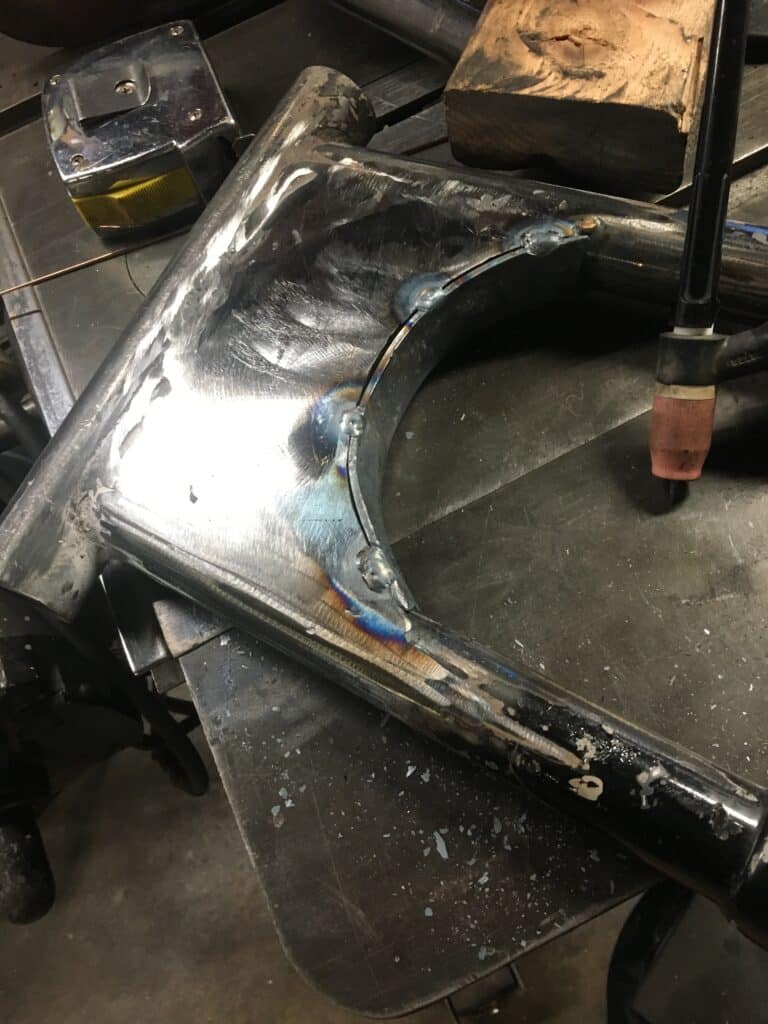
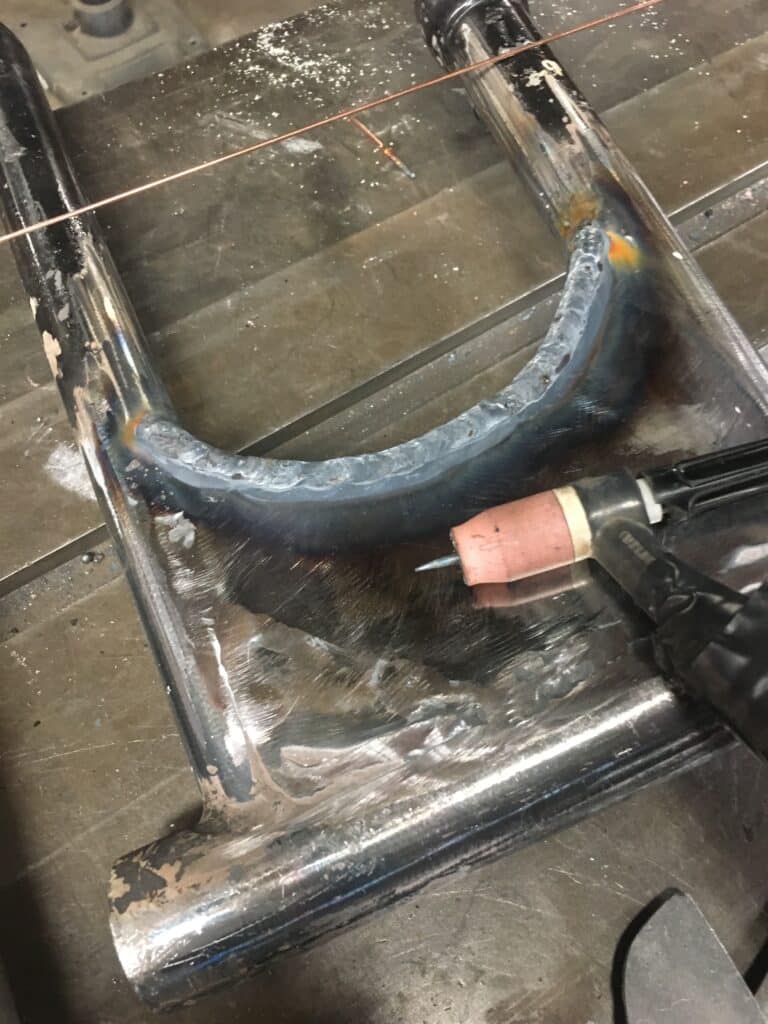
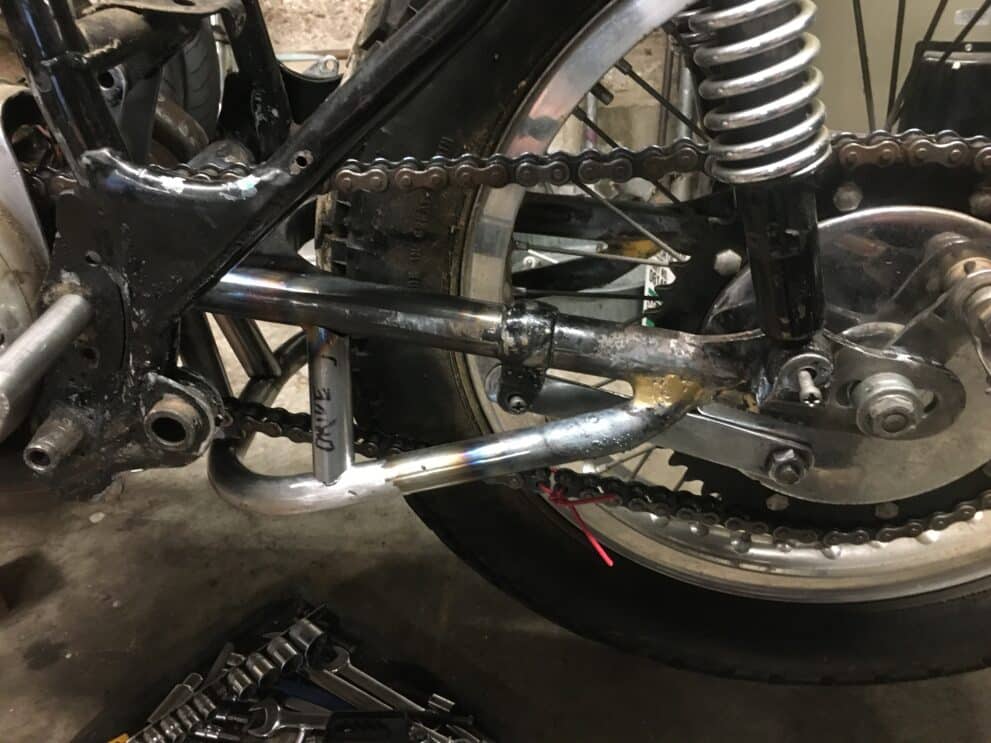
Our attention lately has been with the swing arm. We are adding plates and a stiffing lower cage to the existing swing arm as well as machining a hollow chrome molly pivot axle with thicker than stock walls. One part of me wanted to build a swing arm from scratch. If I had, I think we would have easily shaved 5 lbs or more off the bike. We instead are highly modifying and stiffening the stock swing arm in order to keep a kind of period correct look to a 1964 bike. We will miss that mark slightly with the lower cage welded to the swing arm, but we would miss that mark totally with a new rectangular arm. This one started its life being too heavy at 9 lbs. and we are adding weight to it. It now weighs almost 13 lbs with the modifications, but it will be super stiff and handling should be fantastic.
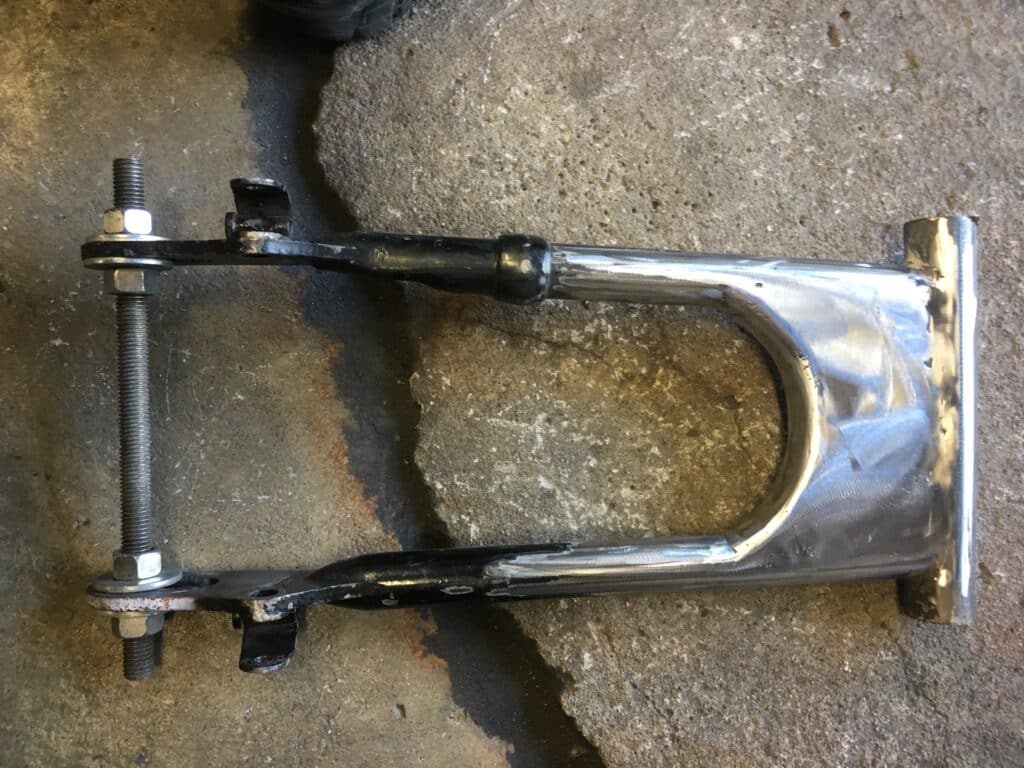
Work on the swing arm has not been without issues, however. I have limited experience in building frames, mostly frame repair, and have a LOT to learn. You could say I know enough to get in trouble, and so far, I have! Welding (heat) causes metal to warp, twist, and move around in many ways, mostly unwanted ways for me. Frame builders use massive steel jigs, some with one inch or more thick steel to hold the parts in place as they weld them. Their experience also tells them which part to weld first and which side to weld first, second, third etc., to keep the parts true, in alignment, and not working against each other. I don’t have that experience or the frame jigs, so we are constantly checking alignment and adjusting. The best we have been able to come up with so far is clamping the swing arm down to the steel plate on my table saw in four places. Sometimes we use heat from a torch in an attempt to relax the stressed metal. We are now using ¾” all-thread with nuts and washers to keep the axle spacing correct.
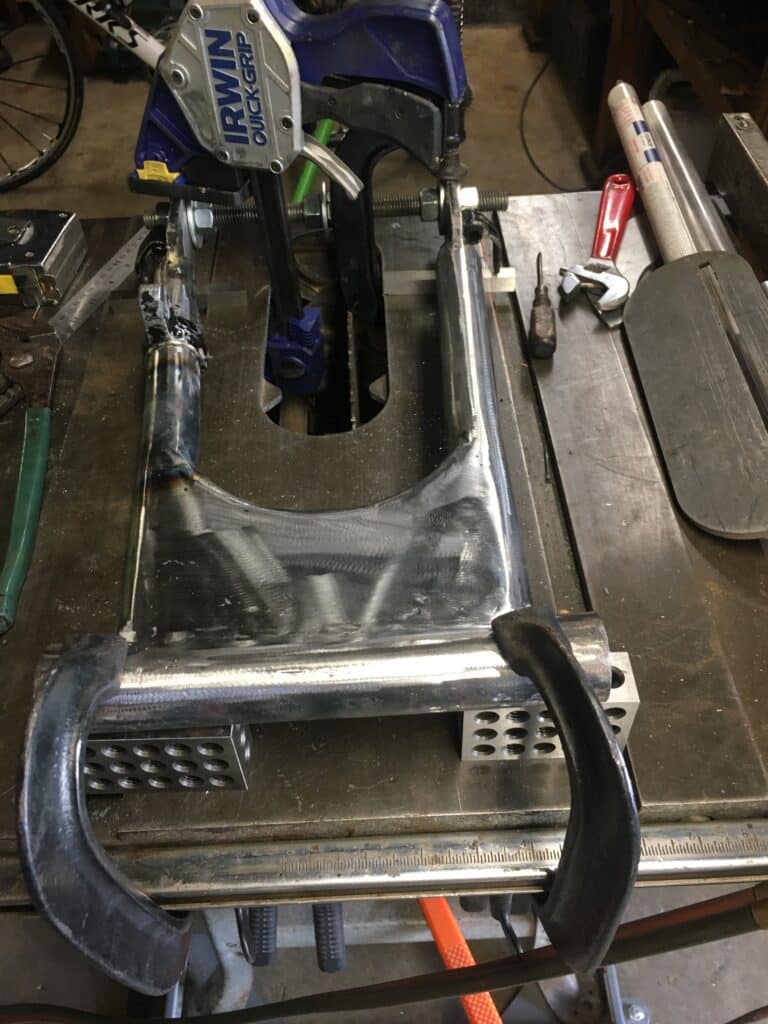
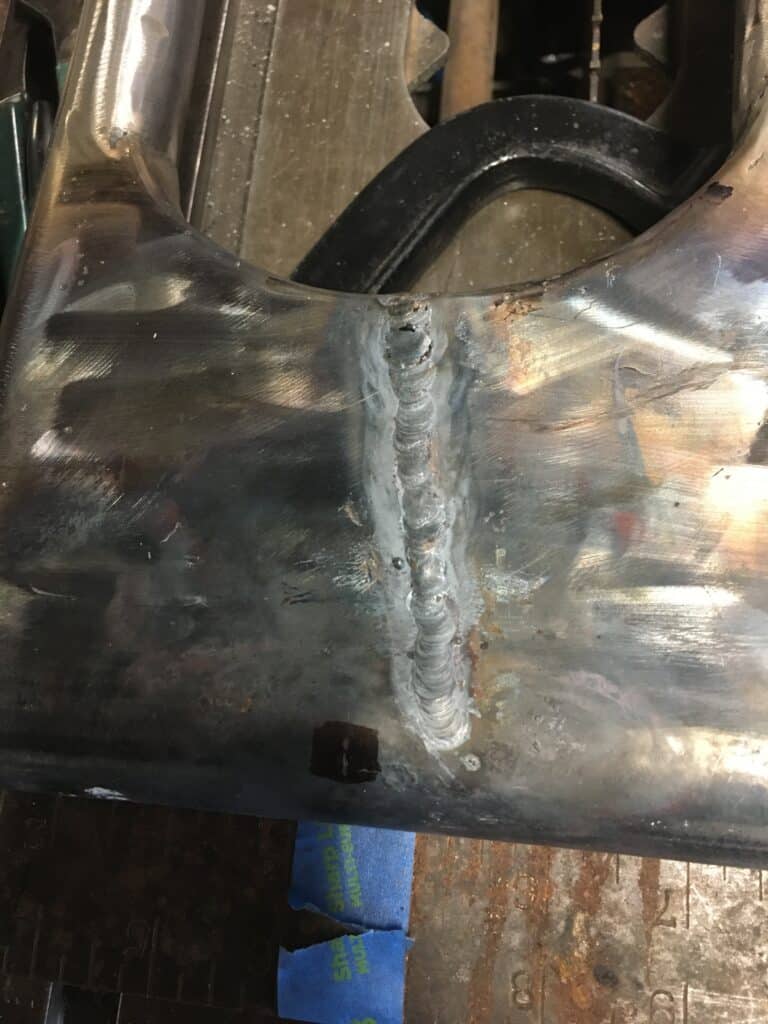
However, we only started doing this after welding the upper and lower plates onto the arm. When we were finished and looking at this beautiful job, we measured the space between the arms where the wheel axle goes and found it had closed in over an inch, just from weld shrinkage, even though I thought I had amply tacked everything in place first. Yikes!!! The pivot axle tube had a nice arch to it instead of being straight. But fortunately, I’ve always known that everyone screws up sometimes and it isn’t the screw-ups that matter, it’s how one fixes the mistakes.
We took the arm to the band saw and cut through the plates we just finished, the cut running parallel to the arms up to the pivot axle tube. Then clamping everything to the table of the table saw, I heated the pivot tube red hot while Eric tightened the all-thread nuts and washers to spread the arms to the correct measurement as shown in the BSA factory manual. This also made the pivot tube perfectly straight once again. While still clamped in four places, we let everything cool down slowly. Then I found a piece of flat stock steel 1/8” by 1-1/4”, the thickness of the upper and lower plates, and ground a taper onto the last four inches. I kept grinding until this wedge- shaped steel could be driven into the spread cut we made in the plate of the arm. We cut off the excess, tacked it in three or four places top and bottom and clamped everything down hard to weld our mistake. We repeated this on the other side. When everything cooled and was unclamped, we were in spec within a 64th of an inch. Happy days!
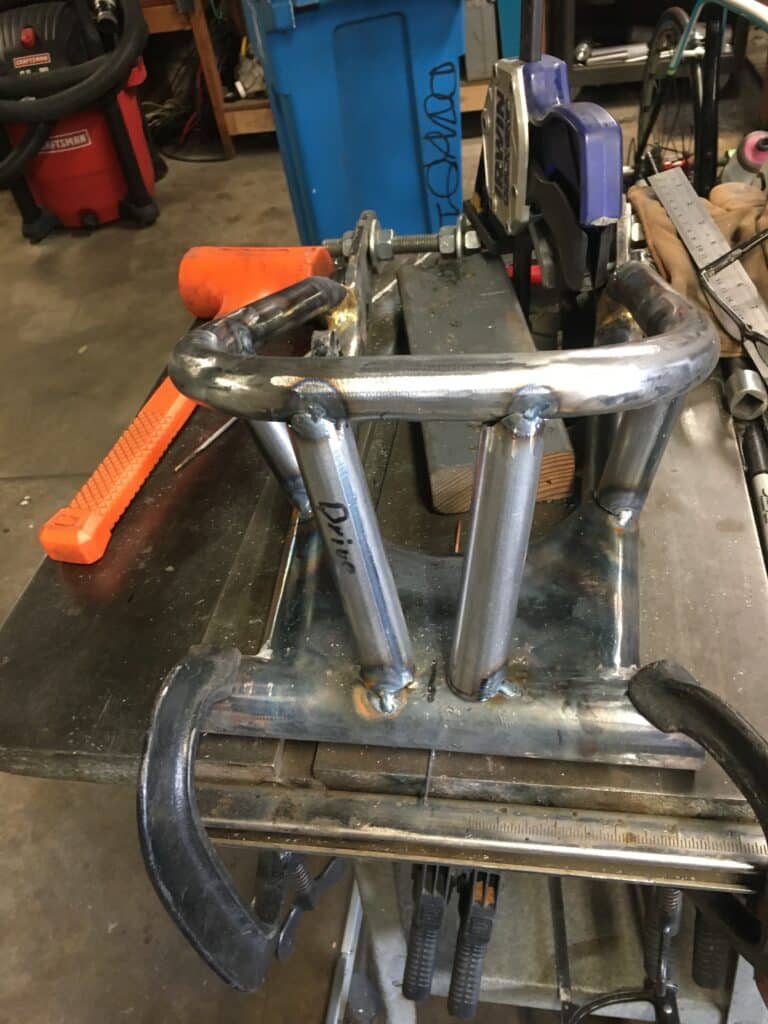
Next, we started on the lower stiffing cage. My friend, Al Lapp, has a tubing bender and he bent a couple of 1” tube legs for me, which I pieced together into the shape I needed. This is a tricky part to build, not only because of weld movement issues, but also because of clearance where the chain runs through the cage. Ground clearance also has to be adequate as well as clearance for the brake stay arm, exhaust system, etc. On top of this, the BSA swing arm is not symmetrical because of the brake drum thickness on the drive side, so what we do to one side is different than the other side. There were many trial fits because of these considerations and as a one off, of course no jig to hold everything in place. This means checking and adjusting at every step. Because of clearance issues and the warping we have been fighting, it has been slow going with MANY trial fits. Each one involves mounting the swing arm in the frame installing the shocks, rear wheel, brake drum and sprocket, chain and adjusting everything to check the clearances.
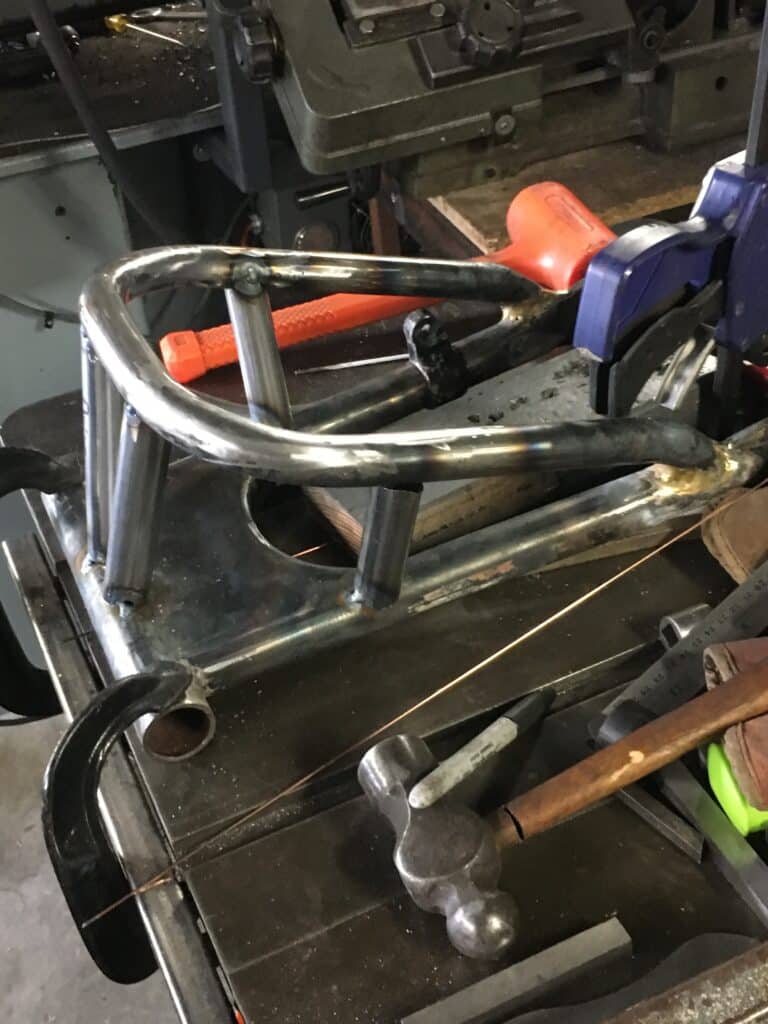
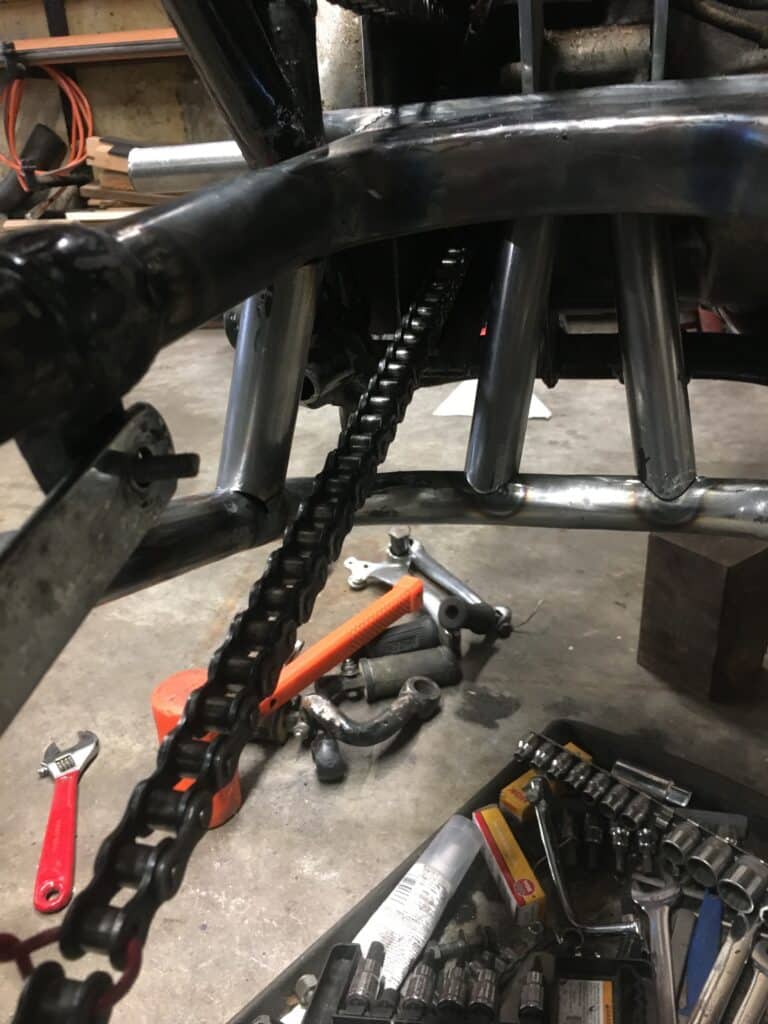
Finally, when we were satisfied with the fit and clearances, I tacked every part together well and clamped it all down hard to the metal table. Since heat was our enemy when welding, I made the decision to TIG tack everything in place and then gas braze the cage to the swing arm. Brazing takes place at a lower temperature (around 1,600 degrees F, I think) and I was hoping this would lower the chance for warping.
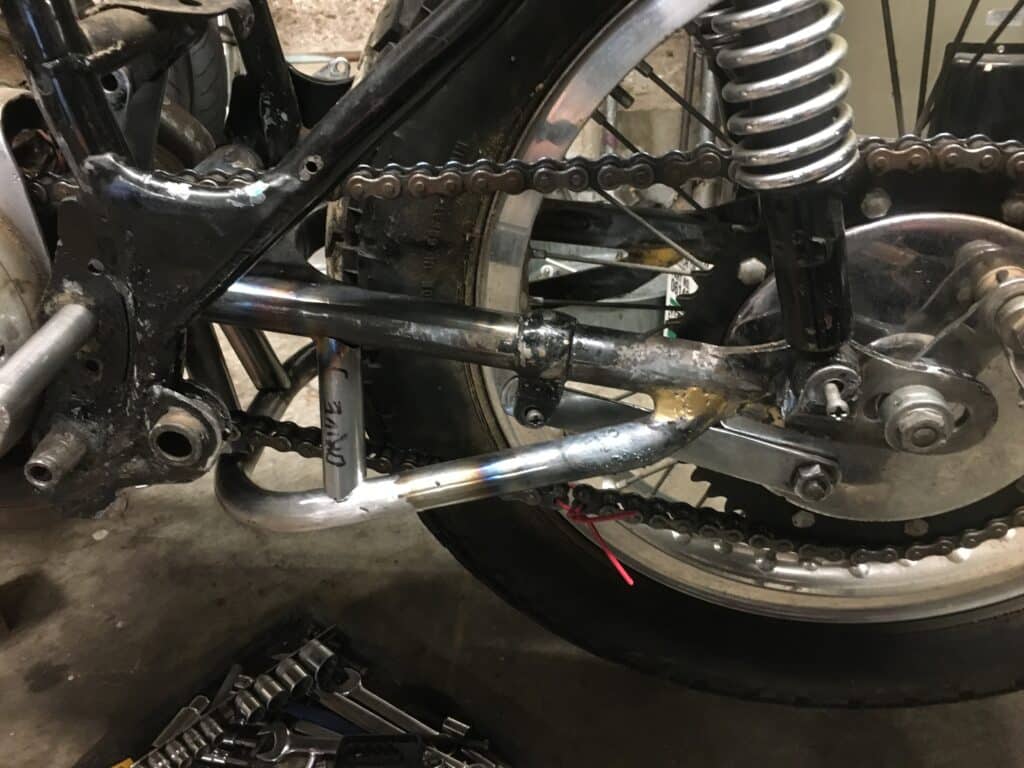
It was a nice hypothesis, but the reality didn’t quite pan out. There was slight warping to the front tube of the swing arm but in the opposite direction of the original warping. The legs of the swing arm and the cage came out well though. The possible “fix” for this slight warping could be accomplished in one of three ways. One, heat the front part of the swing arm red hot and attempt to clamp it down and cool slowly. Two, attempt to cold press the arm in a hydraulic press to remove the warp. Three, since the warp was fairly small, leave it alone and just line-ream the new Oilite bronze bushings to fit the axle and move on. The warping was minor and could never be visually detected once the swing arm was mounted on the frame. From below or above, the warping was invisible and not possible to see, nor from the front of the bike with the motor installed.
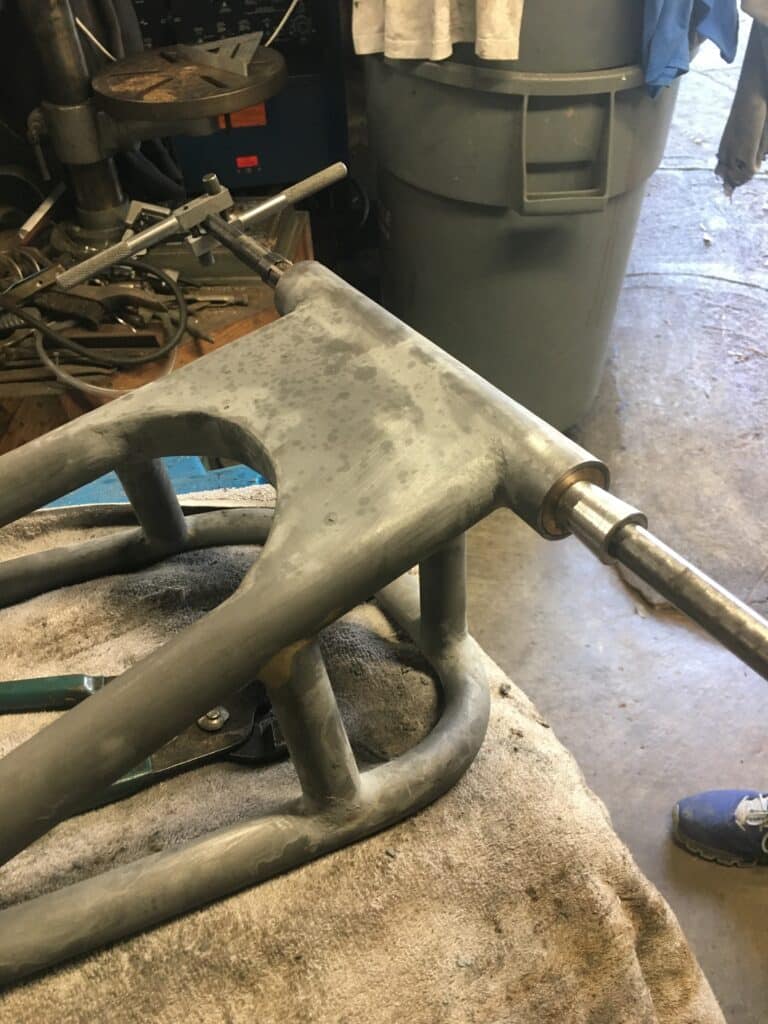
Option one and two had many other issues so we decided on option three, a very straight line-bore. After sandblasting the arm to remove any original paint and obtain an even texture, we used an adjustable 7/8” line-reamer setup on tightly pressed-in bushings to get both right and left bushings in the same plane. We kept upping the size of an adjustable reamer until we reached a good straight fit for the chrome molly 7/8” final axle size. The original swing arm axle is thin mild steel 13/16” tube, but because of the slightly warped modified swing arm tube, we needed to line-ream the bore for a new 7/8” thicker wall 4130 axle, which we made.
The final step for the swing arm was painting it. We decided against powder coating, at least for now, as this bike is a work in progress and we wanted to be able to touch up any changes made to the frame without too much hassle.
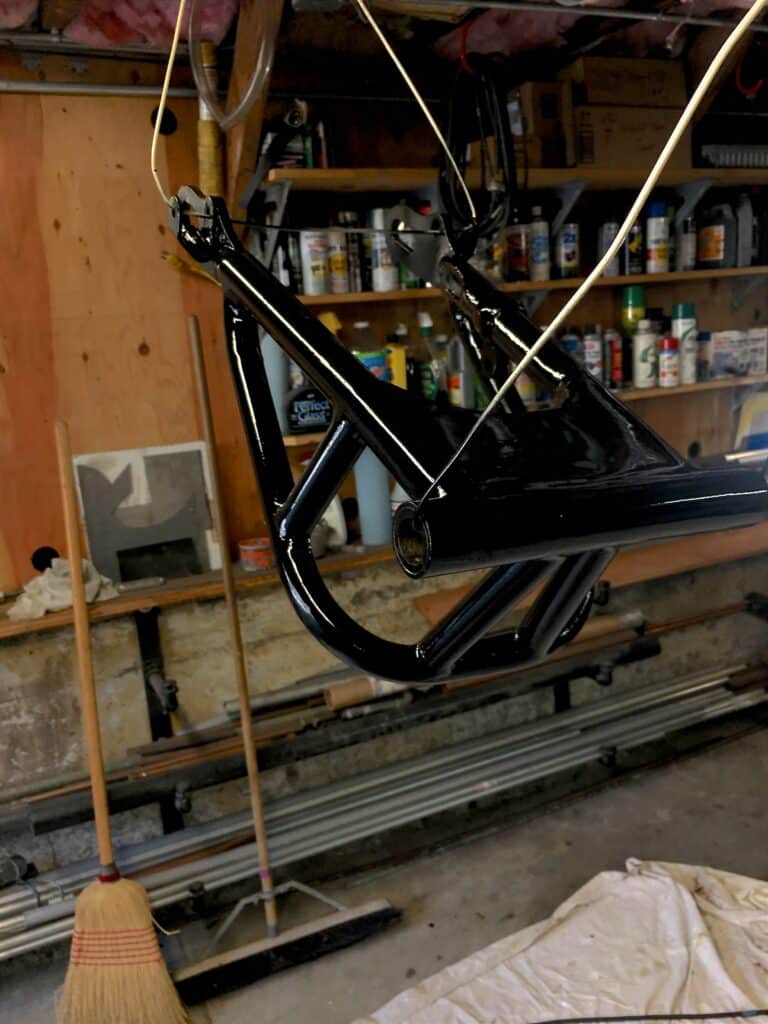
This is where we are now. Next up is work on the rear wheel, which will include polishing the Akront rim, installing new bearings, re-lacing the wheel with stainless steel spokes and mounting the new tire. At that point we will yank the motor out and start work on stiffening the frame, painting it, and getting a rolling chassis. Stay tuned.

Awesome welding skills guys. And those aluminum wheels look terrific 👍👷🏻